How to Start Selling Beats on BeatStars (2026)
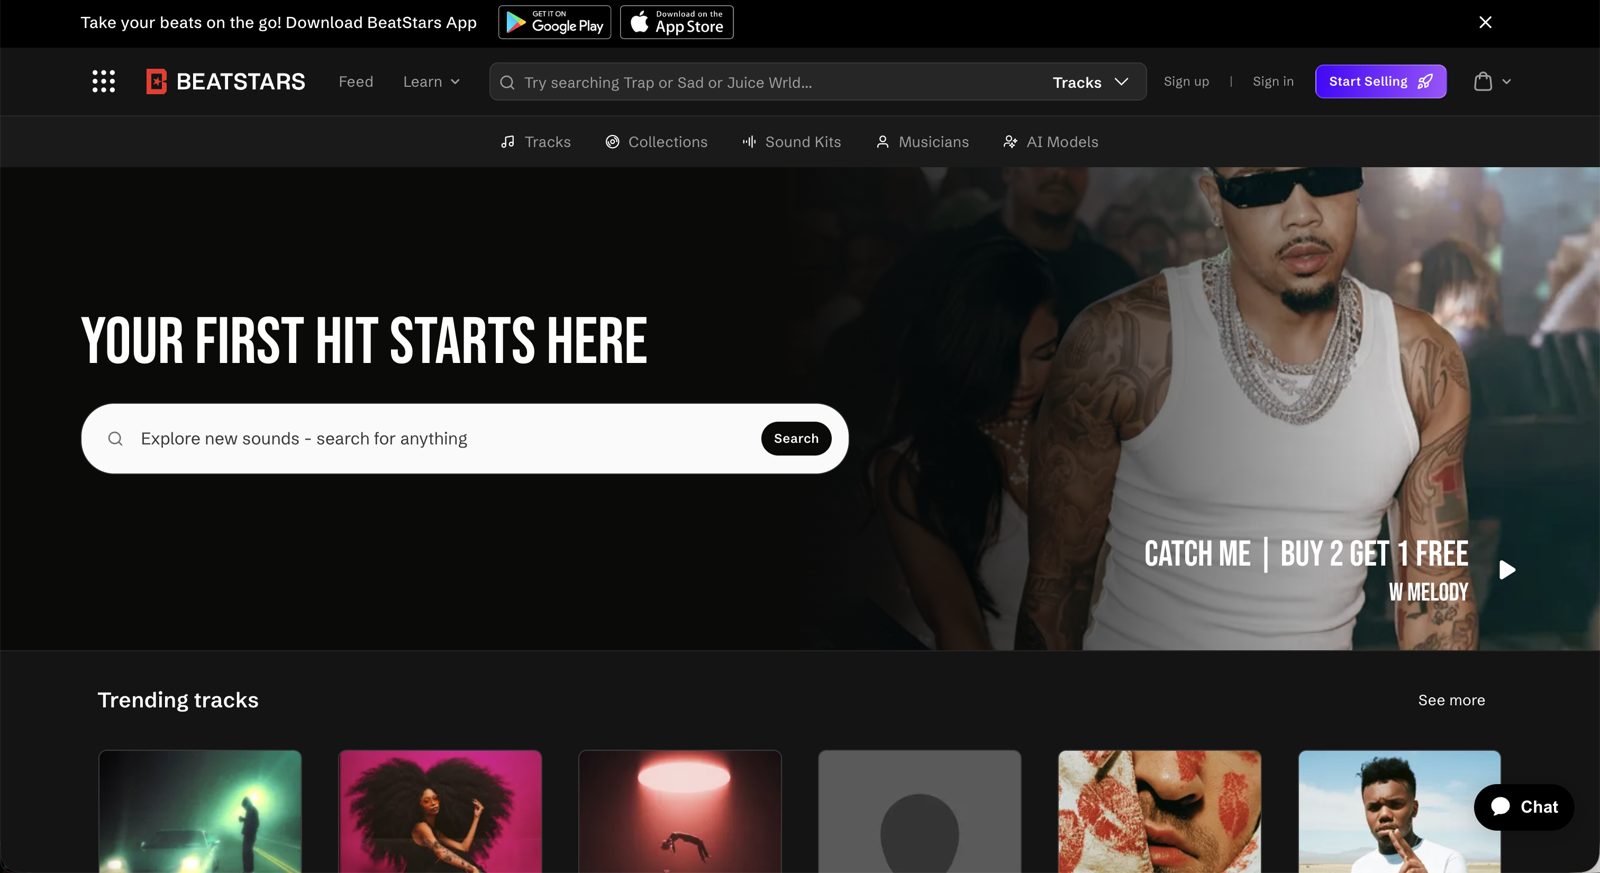
"I want to sell my beats to rappers overseas" — you opened BeatStars with that goal, but many people get stuck on questions like these:
- It's all in English and looks hard…
- What do I need to prepare?
- What is a license?
- Do I need PayPal or Stripe?
- Will beats actually sell?
In fact, a lot of the information online was written years ago, and the screens and pricing structure can differ from today's BeatStars.
So in this article, based on the current 2026 specifications, we walk beginners through account signup, payout setup, uploading beats, license settings, building a profile that sells, and how to combine it with YouTube — in order. The content has been fact-checked against the official BeatStars site and Help Center (as of July 7, 2026). By the time you finish reading, you should be ready to sell beats worldwide.
▶ Official tutorial video (BeatStars)
1. Why BeatStars?
Let's start with the simple question: "Why does everyone use BeatStars?"
BeatStars is one of the world's largest beat-selling marketplaces. Rappers and singers around the world search for and buy Trap, Boom Bap, Drill, Lo-Fi, R&B and Neo Soul beats every day.
There are four main reasons for its popularity.
You can sell worldwide
You can sell to artists overseas while based in Japan. Because sales happen 24 hours a day regardless of time zones, it's not unusual for a sale to occur while you're asleep.
Contracts and payments are automated
When a purchase is made, the license agreement, download and payment are all handled automatically. You don't need to send a contract yourself.
You can sell the same beat many times
This is BeatStars' biggest feature. You can sell one beat you made to 10 or 100 people, which makes it a structure well-suited to stock-style income.
Great synergy with YouTube
These days, the flow of "attract an audience on YouTube, sell on BeatStars" has become standard for beatmakers worldwide. In other words, YouTube = audience acquisition, BeatStars = sales. Just knowing this division of roles makes it much easier to build a sales strategy.
2. Understanding licenses before you start
What confuses beginners most is the phrase "selling a beat." In reality, you're not selling the beat itself. In most cases, you're selling the right to use the beat (a license). There are only two types you need to remember at minimum.
Non-exclusive license (Lease)
This is the most common. You keep ownership of the beat while selling to multiple rappers. You can sell the same beat to 20, 50 or 100 people. Most people growing their income on BeatStars center their sales on this method.
Exclusive license
This is a contract to sell to just one person. After the sale, the beat is removed from the shop and can no longer be sold to others. In return, the price is much higher.
Recommendation for beginners
At first, it's best to focus your sales on Non-Exclusive (Lease), because it's easier to monetize while growing your catalog.
3. Step 1: Create a BeatStars account
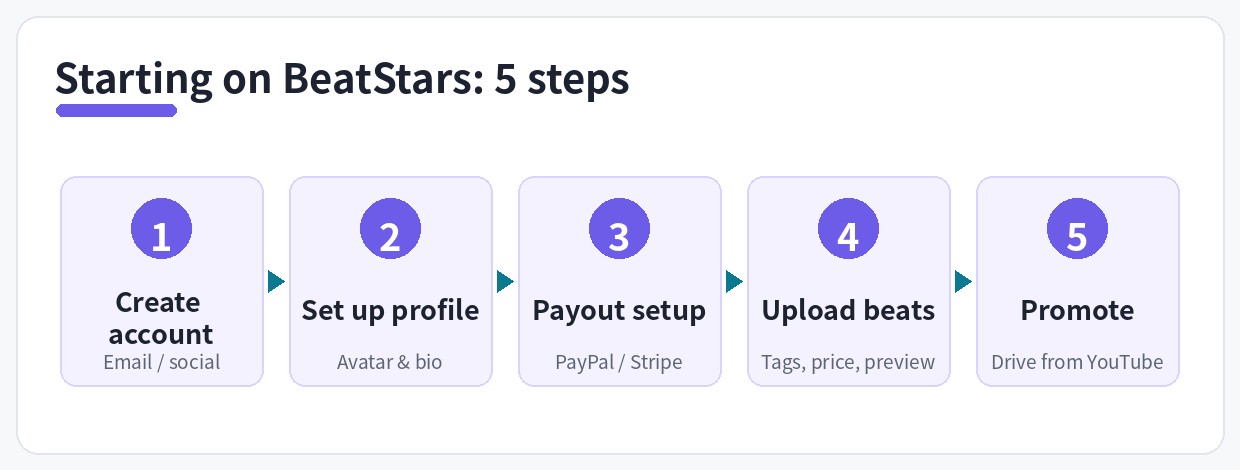
Now let's actually register. The basic flow is the same on a PC or a smartphone.
1. Go to BeatStars
First, go to the official site.
2. Choose a signup method
You can sign up with Google, Apple, an email address or whatever you prefer. Using a Google account is the easiest.
3. Choose your username
This is the most important part.
The Username you set here becomes your shop URL, "beatstars.com/yourname." Since you're likely to use it on social media, YouTube and business cards, pick a name you won't need to change later. Ideally, keep it consistent with your producer/beat alias.
For Country, select Japan (or your own country).
4. Set up your profile first
It's easy to overlook, but on BeatStars your profile is part of your shop. Rappers decide in seconds whether to buy from you. So before publishing beats, set up at least these four things.
- Profile image
- Banner image
- Bio
- Social links such as YouTube and Instagram
Profile image
Set either a logo or a photo of your face if you can. Leaving the default icon lowers your credibility.
Banner image
An image that conveys your genre works well. Expressing your world — Boom Bap, Trap, Neo Soul and so on — makes it look more like a real shop.
Bio
Don't worry if your English isn't strong. Something like "Japanese Beat Producer. Boom Bap / Neo Soul / Lo-Fi. Exclusive & Non-Exclusive Beats Available." communicates plenty.
Social links
Register YouTube, Instagram, TikTok and the like too. They help with audience acquisition later.
Tip: A profile isn't a one-and-done setup. As your beats grow, adding your achievements, play counts and collaborations builds even more trust.
5. Step 2: Set up to receive your payouts
Once your account is created, it's time to prepare to sell. If you skip this, you can end up unable to receive money even when a beat sells, or with licenses that don't work properly. Once set, you'll rarely need to touch it again.
1. Log in to Studio
After logging in, open BeatStars Studio. Studio is now the standard, rather than the old admin screen (the Marketplace management page).
2. Connect PayPal or Stripe
Next is your payout setup. Current BeatStars supports both PayPal and Stripe. You can connect from Studio's "Account Settings" → "Payout Account."
You can sell with either, but since many creators use PayPal when dealing with overseas rappers, starting with PayPal is smooth if you're unsure. Stripe is perfectly fine too. If you don't have an account yet, it's reassuring to complete identity verification at this stage.
3. Initial license setup
On the selling screen, you can set which licenses to sell up front — for example MP3 Lease, WAV Lease, Unlimited and Exclusive. You can change them per beat later, but creating a base setup first saves you from configuring it every time.
4. Set up Track Preferences
This part is actually quite important. BeatStars has a handy feature called Track Preferences that saves your default price, tags, description, Voice Tag, licenses and publishing settings all together. In other words, you don't have to enter the same content every time. You can also toggle here whether AI auto-fill (Autofill, discussed below) applies to future uploads.
For example, if you save a description like "Produced by ___ / Available: MP3 Lease, WAV Lease, Exclusive / Contact: ___," it will auto-fill every time, and you can register tags such as "Boom Bap," "Neo Soul" and "Lo-Fi."
6. Step 3: Upload your beats
Now let's register the beats you'll actually sell. The overall flow is easy to follow alongside the official BeatStars tutorial video (in English) introduced at the top of this article.
1. Press "Add Track"
From Studio, open Content → Tracks. Then click the "Add Track +" button in the top-right of the screen (it may appear as "Create Track" depending on the period) and press "Start" to open the upload screen.
2. Upload your files
On BeatStars, you can basically drag and drop WAV, MP3, artwork and ZIP (stems) into the designated boxes.
Which files should I prepare?
Beginners get stuck here. Basically there are these four types.
- Tagged Preview: For streaming/preview. A file with a voice tag baked in. It helps prevent unauthorized use.
- Untagged WAV: The main file delivered to the buyer. Don't put a voice tag on this one. When you upload a WAV, an MP3 copy is created automatically.
- Artwork: The cover image. A square image is recommended.
- Stems (ZIP): The separated track data exported from your project. Aimed at higher-priced licenses.
Note that, according to the official Help, stem uploads are limited to the Growth plan or higher (as of July 2026). On the Starter plan, WAV and MP3 only are fine.
Tip: You may not even need to export a Voice Tag
On current BeatStars, even if you don't prepare a tagged preview yourself, uploading an untagged file lets the system automatically add a tag for streaming/preview use. The official Help states that "uploading a tagged MP3 is optional; if left empty, an untagged MP3 will be automatically tagged for streaming." Of course, if you want to use your own custom Voice Tag, you can still upload a tagged MP3 as before.
Lining up and exporting Voice Tags in your DAW every time is surprisingly tedious. In that case, Beat Lab: Producer Tag Maker lets you create tagged audio in the browser alone. Then just upload it to BeatStars.
3. Set the title and artwork
After uploading, enter the title, description and artwork.
Titles aren't just "Drake Type Beat." It's important to naturally include searchable elements such as "J Cole Type Beat," "Boom Bap," "Soulful," "Jazz," "Dark" and "Melodic." Rather than cramming in too much, aim for a title that instantly conveys "who this beat is for."
AI fills in your metadata (Autofill Metadata)
As of 2026, there's an "Autofill Metadata" button. Press it and AI analyzes and fills in BPM, Key, Genre, Mood, Instrument and more. AI-filled fields are highlighted in purple and can be edited manually. It's very handy, so use it actively.
However, there's a field AI won't fill in: Tags. The official Help explicitly states that "tags are not auto-filled and must be entered yourself." In other words, whether you get found is basically down to these Tags.
Tips for entering tags
We recommend combining artist (Drake, Future, Kendrick Lamar, etc.), genre (Boom Bap, Trap, Neo Soul, etc.) and mood (Dark, Emotional, Soulful, Jazz, Melodic, etc.). Entering with searched terms in mind makes you easier to find within the Marketplace too.
Thinking up titles, descriptions and tags every time takes surprisingly long. With Beat Lab: Type Beat Title & Tag Generator, you can generate a title, description and Tags all at once just by choosing a genre and mood. You copy and paste them straight into BeatStars, so you save a lot of posting time.
If you use samples, check the rights
On BeatStars, you can't use samples whose rights haven't been cleared. The official Help also asks you to disclose any loops or samples you used — including royalty-free material such as Splice — at upload time (via the checkbox on the Collaborators page). If you use loops or samples, we recommend checking the license terms and registering them according to the official guidelines.
If you use material in beats you sell commercially, it's safest to use royalty-free sample services like Splice or services where rights are already cleared. Sampling from commercial records and other un-cleared sources is not permitted on BeatStars without the rights holder's permission, so use only material clearly labeled "commercial use OK."
7. Step 4: Set up "Free Download" before publishing
This is a point beginners tend to overlook, but it's quite important in the long run. BeatStars has a Free Download feature. It's not just "giving away a beat for free." It's an audience-building feature to grow your future buyers.
What is Free Download?
It's a feature that lets you distribute a tagged MP3 and the like for free before purchase. In a track's Monetization section, turn on "Enable free download" and set the conditions from the gear icon. You can choose to distribute either a tagged or untagged file.
What conditions can you set for downloading?
Depending on your settings, you can choose conditions like:
- Download with no action required (anonymous download)
- Enter name and email address
- Follow on BeatStars
- Follow on X (formerly Twitter)
- Follow on SoundCloud
Note that, according to the official Help, YouTube, Instagram and TikTok can't be used as direct exchange conditions. If you want to grow those followers, the official recommendation is to collect email addresses and guide people later via a newsletter or similar.
Collecting email addresses is recommended
For beginners, collecting email addresses is recommended. The reason is simple: when you publish a new beat, you can announce "New release out now!" to everyone at once. Because it isn't at the mercy of social media algorithms, it becomes a major asset in the long run.
Why give away tagged MP3s for free
A common flow is "download the free MP3 → write lyrics → like it → buy the WAV or stems." In other words, free downloads become the entry point to a sale.
8. How do you decide license prices?
This is where beginners agonize most. But don't worry. At first, it's enough to base things on BeatStars' default prices. There's no need to undersell, and no need to price high from the start.
Rough price guide
The following price ranges are commonly seen on the platform (a rough guide from our editorial team).
| License | Rough price |
|---|---|
| MP3 Lease | $25–40 |
| WAV Lease | $40–75 |
| Stem Lease | $75–150 |
| Unlimited | $150–300 |
| Exclusive | $300+ |
*These are general ballpark figures only. They vary greatly with your recognition, track record and demand.
At first, something matters more than price
It's your catalog size. Which shop is easier to trust — one selling a single beat, or one selling 100? The latter, of course.
A good first target is publishing 30 beats. With 30, you get more search exposure and it starts to look like a real shop. Approaching 100, a state of "selling a little every month" becomes a realistic goal. Rather than chasing the sale of a single beat, building a system to keep publishing consistently tends to lead to results.
9. Can't sell on BeatStars alone? The mindset for getting an audience
This is the most important part. BeatStars is a sales site. But it isn't an audience-acquisition site. In other words, just building a shop won't bring customers easily.
Think of the division of roles like this
The "YouTube → BeatStars" flow is the basis. That is, YouTube = audience acquisition, BeatStars = sales. The common path is "Type Beat video → BeatStars link in the description → purchase."
Post Type Beats
Post videos with searchable titles such as "J Cole Type Beat - Soulful Boom Bap 2026" or "Drake Type Beat - Emotional Trap Beat." Put your BeatStars URL in the description. This alone completes a sales funnel.
You can streamline the titling and tagging of Type Beat videos with the Beat Lab: Type Beat Title & Tag Generator. Preparing a tagged preview file with the Beat Lab: Producer Tag Maker before posting lets you drive an audience while preventing unauthorized use.
10. Plans and seller fees
BeatStars has several plans. According to the official Help, as of July 7, 2026 the seller plans are the following three annual plans. There is currently no free plan for selling beats; instead, a 7-day free trial is provided.
| Plan | Annual (regular) | Best for |
|---|---|---|
| Starter | $19.99/yr | People who just want to start selling |
| Growth | $79.99/yr | People who want stronger features like stem sales |
| Professional | $179.88/yr | People who want to run a brand seriously |
*Prices taken from the BeatStars official Help and pricing page on July 7, 2026. They may be discounted during sales. Please check the official site for the latest pricing and plan details.
Starter
$19.99/year (about $1.7/month). Unlimited MP3/WAV uploads, 4 custom licenses, instant payouts and more — plenty to start selling.
Growth
In addition to Starter's features, it unlocks stem uploads, unlimited Sound Kit/service sales, unlimited custom licenses and more. For people running things seriously.
Professional
For people who want to expand as a business, with a custom-domain website (Pro Page), advanced marketing features and more.
What about fees when a beat sells?
The seller commission everyone worries about is 0% on all three plans. So on any plan, you keep 100% of your sales (official info as of July 2026).
Just two caveats. For purchases made through the Marketplace (the market on beatstars.com), a 12% service fee on the subtotal is added on the buyer's side (it doesn't apply to sales via a Pro Page or embedded player, and you can set the seller to absorb the fee). Also, PayPal and Stripe payment processing fees apply separately. Just keep these in mind.
Which is best to start with?
For beginners, starting with Starter is the safe choice. It's not too late to move to Growth or Professional after beats start selling.
11. BeatStars can sell more than just beats
In fact, beats aren't all you can sell on BeatStars. You can also sell production services such as Sound Kits, Drum Kits, Sample Packs, Vocal Packs, mixing and mastering (unlimited Sound Kit/service sales require the Growth plan or higher). Down the line, you can add more revenue streams.
12. Pre-publish checklist
Finally, let's confirm.
- ☐ Created an account
- ☐ Set a profile image
- ☐ Set a banner image
- ☐ Wrote a bio
- ☐ Connected PayPal or Stripe
- ☐ Checked license settings
- ☐ Exported a WAV
- ☐ Prepared a Tagged Preview (or confirmed the auto-tagging setting)
- ☐ Prepared artwork
- ☐ Checked BPM/Key
- ☐ Entered a title
- ☐ Entered tags
- ☐ Set a price
- ☐ Set up Free Download
- ☐ Pressed Publish
With that, you're ready to sell beats worldwide.
Frequently asked questions
Q. Can I start on BeatStars for free?
A. As of July 2026, there is no free plan for sellers who want to sell beats. You choose from three paid plans: Starter ($19.99/year), Growth ($79.99/year) and Professional ($179.88/year). A 7-day free trial is available, so you can try the interface before subscribing. Please check the official site for the latest pricing.
Q. Are there fees when a beat sells?
A. BeatStars' seller commission is 0% on all plans, so you keep 100% of your sales. However, purchases made through the Marketplace add a 12% service fee on the buyer's side (not applicable via a Pro Page or embedded player), and PayPal or Stripe payment processing fees apply separately.
Q. Can I receive payouts from Japan?
A. Yes. If you connect a PayPal or Stripe account in BeatStars Studio, you can receive overseas sales while based in Japan. The funds can then be withdrawn from each service to a Japanese bank account.
Q. Is it OK if my English is limited?
A. It's fine. A simple, formulaic English profile and product description communicate well enough, and BeatStars automatically handles everything from purchase to license agreement and delivery. You can also handle buyer messages with a translation tool.
This page contains affiliate advertising (PR). As an Amazon Associate, Beat Lab earns from qualifying purchases.
Summary
Because BeatStars is an English-language service, it may feel difficult at first. But once you've set it up, the rest is just repeating "make a beat → upload it → promote it on YouTube."
Almost no one sells big with their first beat. But by stacking up 10, 30 and 100 beats, the chance that your beats reach rappers worldwide steadily grows.
And actively streamline the parts you can:
- Beat Lab: Producer Tag Maker to quickly make preview audio
- Beat Lab: Type Beat Title & Tag Generator to streamline SEO
All of these tools work in the browser alone and greatly shorten the time to publish a single beat. Building a system to keep publishing consistently is the shortcut to getting your beats to listeners worldwide.