How I Build a Boom Bap Mixing Template — Drop In Your Stems and Get "Your Sound" Every Time
Making beats is fun, but the moment it's time to mix, I suddenly drag my feet… For me, the culprit was always that "start from scratch and re-insert every plugin" routine. Firing up an EQ on every track, adding a comp… doing that same setup from scratch over and over honestly got tedious. On top of that, having to remember "what settings did I use last time?" every single time was its own little chore — so I kept putting off even starting the mix.
So I built this dedicated Boom Bap mixing template. The routing and chains are set up and locked in ahead of time, so all I do is drop each part's stem onto its assigned track. No more re-inserting plugins every single time, and every mix comes out with the same character — my sound. It lowered the hurdle to actually start mixing, and it made cranking out beats so much easier.
In this article I'm sharing the template I actually use — the full routing, per-track chains, and settings, all of it. I'll name every plugin too, but you don't need to own them. I've included the key ideas so you can recreate the same "thinking" with the EQ and comp you already have.
The target is that Pete Rock / Lord Finesse / J Dilla / Joey Bada$$ / Da Grassroots sound — round, dusty melodic parts over booming, fat drums. Not sparkly, mid-focused, narrow stereo, and pushed for loudness only far enough to keep the punch. I'm working in Pro Tools at 85–95bpm, but the thinking is the same in any DAW.
 The sound-design step (before para-out) is a separate article →This article covers the finishing stage after you print para-outs. Choosing samples and fattening the loop itself is covered here. Craft the sound there first, then drop it into this template.
1. Overall routing
There are two sub-buses. Drums/perc go to the Drum Bus, keys and strings go to the Inst Bus (melodic parts), each with a glue comp. Bass alone stays independent and goes straight to the Master (I'll explain why below). Reverb / Delay are handled on sends.
Why keep Bass on its own path
If you route Bass into the Drum Bus, the bus glue comp reacts to the loudest low end — the bass, so the whole drum kit pumps (dips) in time with the bass. Keep it separate and the Drum Bus glue only works on the "live drums," pulling them together exactly as intended. This one matters a lot, so lock it in first.
| Bus | Tracks it receives | Processing |
|---|---|---|
| Drum Bus | Kick / Snare / Hihat / Sleigh Bell / Shaker | Glue comp 4:1 · GR 3–6dB |
| Inst Bus | Piano / Rhodes / Strings (+ melodic samples) | Glue comp 2:1 · GR 1–2dB |
| Bass (independent) | Bass only | Solo processing only → straight to Master |
| Master | Everything summed | Tape → Ozone → L4 (Ceiling −1.0) |
2. Standard chain per track
Here's the "insert order" for each track and what to aim for with Boom Bap. The numbers are starting points — fine-tune the final result by ear. I've linked the plugin names, but if you don't own one, the "To recreate with what you already have" note in each section shows how to do the same thing with your own EQ and comp.
·ZL Equalizer 2 (a powerful free EQ) = in this template I use it for the front-end low-cut on each track. It's a free EQ built under the influence of FabFilter Pro-Q, with a real high-pass (variable frequency and slope) plus a built-in analyzer, so you can cleanly remove only the unwanted lows while checking with both ears and eyes. Any high-pass you own (Pro Tools EQ III, etc.) does the same job.
·IDX = frequency-dependent automatic dynamics (the base layer of the chain)
·H-Comp / RComp = compression (character / leveling)
·Curves Equator = an intelligent EQ that automatically cleans up mud and masking (note: it is NOT an HPF/LPF)
·Kramer Tape / RC-20 / RX950 = tape / lo-fi texture
·API 560 = a graphic EQ placed last in the chain, for optional final manual EQ tweaks (tonal boosts / roll-offs). Its appeal is that you just move a few faders (= simple).
So whenever a chain says "low-cut at ◯◯Hz" up front, read that as done by ZL Equalizer 2 (or any high-pass you own) at the front of the chain. The automatic clean-up of mud and masking is handled by Curves Equator, and final tonal tweaks like "roll off the top at 10–12kHz" are done with the API 560 at the very end of the chain.
In short: low-cut = ZL Equalizer 2 up front, and the final polish EQ = the API 560 at the end.
By the way, low-cutting first means that when you compress afterward, the "bands you actually want" lift up cleanly (because the comp doesn't waste its reaction on unnecessary lows). IDX plays the same role of preparing the base.
Also, the amount you apply from IDX, Curves Equator, RC-20 and the tape stuff should be set by ear, not by numbers. Keep IDX's main knob light-to-moderate, nudge Curves' effect only a touch after it auto-analyzes, and keep tape/RC-20 subtle as the default. For all of them, "don't overdo it" is the Boom Bap trick.
If you want a free EQ for the low-cut, the strongest right now is ZL Equalizer 2. It's a free EQ built under the influence of FabFilter Pro-Q — with real variable-slope high-pass filters, up to 24 bands, and even dynamic EQ. You'll wonder how it's free. Even without EQ III or Pro-Q, this one plugin handles every track's front-of-chain low-cut just fine.
If you have room to go further, add some flavor EQ to the chain (gentle boosts/cuts to taste) and tidy up masking (frequency overlap) between tracks (see how to fix frequency masking for the full workflow, from manual complementary EQ to dedicated plugins). When you want to do masking quickly, sonible pure:unmask is great — its AI automatically clears the overlap between two tracks, so you just route a sidechain and pick a profile (the same idea as Curves Equator's auto clean-up, but easier). Available on Plugin Boutique.
The reason we start with the low-cut is that the low end is the most crowded part of a mix.
Every instrument contains some low frequencies. When unnecessary low end piles up, the kick and bass lose their place and the whole thing sounds muddy.
Put the other way around: just tidying the unwanted lows first makes every later EQ and compressor decision much easier. When I start a mix, I almost always get the low-cut done on each track first.
What a low-cut gives you
A low-cut isn't about "reducing the bass." It's about removing only the unwanted components so the low end you actually want can shine. As a result:
・the kick and bass are less likely to get buried
・the whole mix sounds clearer
・compressors and limiters don't react to unnecessary lows
・you free up headroom, making it easier to push loudness
are the kinds of benefits you get.
How I do my low-cut
I don't do anything complicated. First, while soloed, I raise the high-pass filter right up to the edge where the character of the sound doesn't change. Then I always listen back with the full mix. Even if it's fine soloed, it can end up too thin inside the mix. Finally, back off a touch if needed, and done. Just remember the flow: "find it soloed, confirm it in the mix."
Of course, instruments where the low end is the star — like kick and bass — are the exception. Those tracks I basically don't low-cut, or if I do, I judge it very carefully.
The EQ I use
You can low-cut with any EQ, but one with an analyzer makes the job much easier. If you're starting for free, I recommend ZL Equalizer 2. You can adjust the high-pass while watching the analyzer, which makes it friendly even for people who find it hard to judge by ear alone. Anywhere this article says "low-cut at ◯◯Hz," you can reproduce it just as well with this EQ or with the EQ you already own.
Kick → Drum Bus
【IDX (Soft)】 gentle foundation.
【ZL Equalizer 2】 low-cut (remove subsonic and other unwanted lows).
【H-Comp (PhatKick)】 GR 3–4dB for punch.
【Curves Equator (Kick)】 auto-clean resonance/masking.
【API 560】 final manual EQ tweaks: boost 60–100Hz slightly / dip 150–300Hz mud / a touch of click 2–4kHz (nothing needed above 8kHz).
Goal: prioritize the "thud" over sub.
Bass → independent → Master
【IDX (Soft)】 foundation.
【Kramer Tape】 drive gently for grit.
【H-Comp (Bold Bass)】 character comp.
【Curves Equator】 dip the kick's peak (60–80Hz) on the bass by 1–2dB (complementary EQ) + clean resonance / roll off the top around 4–5kHz.
【RComp】 level it (Ratio 3.99 / Atk 0.50 / Rel 5.00 / Gain 0.0 / Warm).
【MaxxBass】 last, add harmonics for audibility (crossover ~60–80Hz). Placing it after the comps keeps the added harmonics from being squashed and avoids low-end pumping.
【Low end】 below 120Hz mono / high-pass below 25–30Hz.
Snare → Drum Bus
【IDX (Soft)】 foundation.
【Kramer Tape】 push harder for grit.
【RComp】 Ratio 2.00 / Gain 3.3 / Atk 0.50 / Rel 5.00 / Warm to even out the level.
【Curves Equator (Snare)】 auto-clean resonance.
【API 560】 final manual EQ tweaks: add body 180–250Hz for thickness / crack at 3–5kHz / tame harshness above 8kHz.
Plus: send it plenty to Reverb.
Hihat → Drum Bus
【ZL Equalizer 2】 low-cut below 300–500Hz.
【Curves Equator (Hi Hat)】 auto-clean resonance.
【API 560】 final manual EQ tweaks: roll off the top at 10–12kHz (keep it un-sparkly).
Keep the level low so it blends into the drums.
Sleigh Bell / Shaker → Drum Bus
【ZL Equalizer 2】 low-cut the lows hard.
【Curves Equator (Bell / Percussion)】 auto-clean resonance.
【API 560】 final manual EQ tweaks: roll off the highs at 10–12kHz.
Busy, ticky part, so keep the level low (same percussion default as Hihat).
Piano → Inst Bus
【IDX (Soft)】 foundation.
【ZL Equalizer 2】 low-cut below 100–120Hz (to clear space for kick/bass).
【Curves Equator (Piano)】 auto-clean resonance.
【RComp】 gently level it with the common melodic-parts setting (Ratio 1.30 / Atk 0.50 / Rel 5.00 / Gain 3.0 / Warm).
【RC-20 (Vinyl 2)】 add lo-fi texture.
【RX950】 optional extra sampler character.
【API 560】 final manual EQ tweaks: LPF the top at 10–12kHz to make it dusty.
Rhodes → Inst Bus
【IDX (Soft)】 foundation.
【ZL Equalizer 2】 low-cut below 100–120Hz.
【Curves Equator (Electric Piano)】 auto-clean resonance.
【RComp】 the common melodic-parts setting (Ratio 1.30 / Atk 0.50 / Rel 5.00 / Gain 3.0 / Warm). Electric pianos wobble, so level them out.
【RC-20】 texture (optional).
【API 560】 final manual EQ tweaks: roll off the top to soften the edges.
Strings → Inst Bus
【IDX (Soft)】 foundation.
【ZL Equalizer 2】 low-cut below 100Hz.
【Curves Equator (Strings)】 auto-clean resonance.
【RComp】 the common melodic-parts setting (Ratio 1.30 / Atk 0.50 / Rel 5.00 / Gain 3.0 / Warm).
【Stereo Width】 widen only up to 110–130% (100% is the original; don't over-widen).
【API 560】 final manual EQ tweaks: LPF the top at 10–12kHz.
【Center (opt.)】 when centered content sticks out too much, use Waves Center to lower just the middle content and clean it up (M/S).
It's a "sit it in the back" part.
How to slot in other melodic parts (synth / sax / guitar, etc.)
Send all melodic parts to the Inst Bus and start from the same order as Piano/Strings (EQ → level → Curves Equator → light comp → texture). The only two things you change are "comp amount" and "amount of top roll-off."
- Sax / acoustic instruments / horns: level swings a lot, so comp harder to even it out. Keep the mids and the breath nuance. Gently tame the ear-catching 2–5kHz. If you want dust, roll off the top.
- Synth (pad / lead / pluck): level is steady, so comp can be light. Treat pads as Strings, leads/plucks as Piano. The more digital and bright it is, the harder you LPF the top to take the edge off.
- Guitar: same family as Piano. Keep the acoustic feel while rolling off the top to blend it in.
- Bass-like synths: send them to the Bass slot, not the Inst Bus (mono lows, share space with the kick).
3. Sampled melodic parts (prepare two channels)
How you handle a chopped sample depends on whether it already contains low end or not. In practice the only difference is "where the high-pass at the top sits." Prepare two preset channels and switch between them. Both go to the Inst Bus.
① Sample with no bass (you add your own bass)
② Sample with bass (the sample also carries the low end)
EQ: first pull the output down −3dB, then—
・thin lows → peaking (medium Q), +7dB around 60Hz
・bring out definition → a slightly tighter Q at ~400Hz, +2dB (analog feel) / −2dB (cleaner)
・for a hi-fi feel → a shelf +2dB above 9kHz (to taste)
Comp: loops already have loudness, so overdoing it actually lowers the level. Start with Ratio 1.3:1 · fastest attack/release · +3dB makeup (just enough to recover the −3dB from the EQ). Lower the threshold until it stops clipping.
※ The melodic-track RComp (Ratio 1.30 / Atk 0.50 / Rel 5.00 / Gain 3.0) follows this same thinking.
The "filtered sample" texture: when you sandwich the band with an LPF (top) and an HPF (bottom) and narrow it down, you get that "filtered sample" sound (a Pete Rock / J Dilla staple). My pick here is Inphonik RX950 — it emulates the classic Akai S950 sampler, so just running the loop through its built-in filter and 12-bit conversion instantly gives you that gritty, dusty "through-the-sampler" texture. If the drums/noise baked into the sample get in the way, cutting them out to extract "just the melodic part" is another classic move.
4. Tips by bass type (electric / wood / sub)
The framework (mono lows, share space with the kick, roll off the top) is the same for every bass. The only difference is "which band you want to preserve."
| Type | What to preserve | Processing tips |
|---|---|---|
| Sub bass (808/synth) | Deep lows (the foundation) | It's almost all low end. Mono management and its level balance against the kick are the main event. Add a little sidechain from the kick if needed. No need for the top, so cut it. |
| Electric bass | Mids 200–800Hz + finger nuance | Don't over-cut those mids (that's the core you hear on a phone). Doesn't need as much sub as an 808. Add grit with tape / RC-20. |
| Wood bass (upright) | Low-mids 150–300Hz warmth + the "bomp" of the attack | Keep the comp light so you don't kill the natural bounce. Roll off the top for a vintage feel. Suits a jazzy direction. |
① Tune it to the key (pitch/glide each note). An out-of-key 808 fights everything. Also tidy up the tail length so notes don't smear.
② Make it audible with saturation/distortion, not EQ. A pure 808 has almost no energy on small speakers, so the "parallel distortion layer" below works especially well (duplicate the 808 → drive the copy hard → HPF it 120–200Hz → blend it under the clean 808).
③ Keep the kick and 808 out of each other's way. Use the "kick→bass sidechain" below to duck it for a moment, plus complementary EQ so one owns the deep sub (40–80Hz) and the other owns the knock (100–200Hz + 2–4kHz).
※ For a Trap-leaning 808, push the saturation and sidechain harder and don't roll off the highs.
Make sub audible with "saturation / MaxxBass," not "EQ"
This one's worth knowing. Pure sub (a near-sine tone) has no content up top, so EQ-ing it up brings out nothing. Saturation (distortion/tape), on the other hand, can "generate" harmonics, so it creates the cue that lets a phone or laptop speaker say "there's bass here." Physically, that's the correct move.
- The go-to is MaxxBass (built for harmonic generation). Set the crossover around the sub's fundamental (aim for 60–80Hz). Keep the real low end intact while raising the harmonics only to the minimum you need to "hear" it on a phone. Push too far and it gets thin/harsh.
- Instead of / in addition to that: the distortion in Kramer Tape or RC-20 can add harmonics too. Keep the drive light (a few dB), subtle. Drive it hard and it turns muddy.
Recommended: a parallel distortion layer (great for running a single sub). Duplicate the sub → distort the copy hard → high-pass that distorted copy at 120–200Hz (= keep only the harmonics) → blend it thinly under the clean sub. The low end stays clean, and you add only the audibility (harmonics).
Kick-to-bass sidechain
Put a sidechain-capable comp on the bass and feed the kick to its key input. The instant the kick hits, the bass ducks a touch, so the kick's weight stays clean and up front. I use C1 comp-sc. In Boom Bap the goal isn't "to make it pump" — it's "to open up a little space for the kick just for an instant" — so the rule is to keep it very shallow.
| Parameter | Recommended | Purpose |
|---|---|---|
| Key input | Kick (sidechain) | Trigger the bass from the kick signal |
| Ratio | 2:1 – 4:1 | Shallow. Don't use a strong ratio |
| Threshold | Wherever GR is 1–3dB | 1–2dB is plenty for Boom Bap |
| Attack | 5–15ms | Duck quickly right after the kick's attack |
| Release | 60–150ms (Auto OK) | Recover before the next kick |
| Knee | Soft | Act naturally |
5. FX returns (Reverb / Delay)
Reverb/delay are handled on each track's send. The trick is to leave the units alone and set the depth by how much you send. As a guide, send the most to the snare (depth in the drums), a little to the keys, and nothing to the kick and bass (it muddies the low end).
Reverb (send return)
Delay (send return)
6. Bus processing and Master
Drum Bus (glue) ★ the heart of Boom Bap
Bring out the knock (the drum's impact) with Transient Master: Attack = the first hit, Sustain = raise/lower the tail and body ring. Use these to "add punch" and "tighten." Note: Attack/Sustain aren't in dB but a relative scale of roughly −100 to +100, so stop by ear at "the smallest amount where the hit feels good."
- Drum bus (start here): place it after the glue comp. Attack light (10–20% of the scale) / Sustain 0 to slightly negative.
- Individual Kick/Snare (fine-tuning): before each track's comp. Kick = Attack a bit stronger / Sustain − (tighten). Snare = Attack medium / Sustain to taste.
- Hihat/perc generally don't need it. You don't have to put it on every track. Push it too far and it gets "clicky" and unnatural, so use the smallest amount that puts the hit pleasantly up front.
Inst Bus (glue)
Master (final stage)
A note on loudness: this −10 to −9 LUFS figure is aimed at "lease / commercial loud." Streaming services like Spotify normalize to about −14 LUFS and turn the volume down, so it won't put you at a disadvantage there — but it's also not a race where louder is always better. Measure your own bounces with the loudness meter tool for peace of mind. Also, if you distribute a loud master (louder than −14 LUFS), Spotify recommends keeping True Peak at −2 dBTP or lower to avoid clipping in their lossy transcodes — so if you push the level, set Ceiling to −2.0 dBTP instead of −1.0.
Ideal loudness also depends on genre: trap and drill are often mastered louder on purpose (roughly −7 to −9 LUFS), assuming streaming normalizes them toward −14. Boom Bap doesn't push that hard — keeping punch and dynamics is the whole point of this template.
Dither only on the Master's L4: dither goes once, on the final stage of the project. Never put it on individual tracks (stacking it degrades the audio). In this template, the correct setup is Dither ON on the Master's L4, and OFF everywhere else.
7. Mixing tips (read when you get stuck)
Complementary EQ = splitting space between kick and bass
The kick and bass sound in the same low range, so they clash. What you do is not "cut everything" but dip your own side a little at the frequency where the other is loudest.
Roll-off, mono, loudness
- Roll-off: gradually lowering everything above (or below) a frequency on a slope, not a cliff. "Roll off at 10–12kHz" = gently taper everything above 12kHz = less harshness, more dust. You get that hazy SP-1200/MPC-ish texture.
- Mono: keep the lows (below 120Hz) mono. It stays stable on phones and small speakers, and the kick and bass don't muddy up. Don't over-widen the stereo — keep an image that doesn't thin out even in mono playback.
- Loudness: aim for integrated −10 to −9 LUFS. Push too hard and the punch and dynamics die. Always keep the L4's Ceiling at −1.0 dBTP.
For checking BPM/key, or the loudness / True Peak of your bounces, try this site's free tools (BPM & key detection / loudness meter).
8. Stem workflow rules
- Standardize your stems: same sample rate / bit depth, all starting from zero at the top of the song (bar 1), don't cut the tails, no master processing (pre-master).
- Fix the drop-in positions: always keep the template's track order and the stem order the same (e.g. 01_Kick / 02_Snare …).
- For Delay, all you do per song is match the SYNC tempo (note values are fixed and follow automatically).
- Save export presets: tagged MP3 / untagged WAV / Trackout stems.
- Load two reference tracks into the template and match loudness and tonal balance.
The full plugin list (what I use in this template)
This is the exact setup I actually use. You can jump to each store from the plugin names. For anything you don't own, you can swap in your own gear using the "To recreate with what you already have" notes above, so there's no need to force yourself to buy them all.
| Role | Plugin |
|---|---|
| Low-cut / EQ | ZL Equalizer 2 (free; low-cut on all tracks / used on FX returns) |
| Polish EQ (graphic) | Waves API 560 |
| Intelligent EQ | Waves Curves Equator |
| Auto dynamics | Waves IDX Intelligent Dynamics |
| Compressor | Waves H-Comp / Renaissance Compressor |
| Sidechain | Waves C1 Compressor (kick→bass ducking) |
| Transient | NI Transient Master |
| Low-end enhancer | Waves MaxxBass |
| Tape / texture | Waves Kramer Master Tape / XLN RC-20 Retro Color / Inphonik RX950 |
| Stereo width | AIR Stereo Width (a simple widener bundled with Pro Tools) |
| Center adjust (M/S) | Waves Center (tame parts that stick out — mainly Strings) |
| Bus glue | NI Solid Bus Comp (bundled with Komplete) / alternative: Waves PuigChild 670 |
| Reverb | Valhalla VintageVerb (direct) |
| Delay | Pro Tools Mod Delay III (stock) |
| Master | Softube Tape / iZotope Ozone 11 / Waves L4 |
| Analyzer | Blue Cat's FreqAnalyst (free) |
Waves is best bought in a bundle
Most of this chain is Waves. Buying them one at a time gets expensive, but a bundle drops the per-plugin cost dramatically. Waves bundles pack dozens to well over 100 plugins into a single purchase, and they're on sale at roughly 80–90% off almost all the time — a stunning price. Broken down per plugin, it works out to just a few dollars each; the value is genuinely incredible. Pick one based on "how many of these plugins you want this time." In the table below, I've laid out which bundle contains the 10 plugins used in this article (as of 2026; subject to revision).
 GoldView Gold →
PLATINUM
GoldView Gold →
PLATINUM PlatinumView Platinum →
MERCURY
PlatinumView Platinum →
MERCURY MercuryView Mercury →
ULTIMATE
MercuryView Mercury →
ULTIMATE Ultimate (subscription)View on Waves →
| Plugins in this article | Gold | Platinum | Mercury | Ultimate |
|---|---|---|---|---|
| Plugins included | 40+ | 67 | ~190 | 240+ |
| Sale price (current) | $159 ~80% off | $199 90% off | check price | Subscription |
| List price (varies) | $799 | $1,999 | high | — |
| API 560 | — | — | ✓ | ✓ |
| Curves Equator | — | — | ✓ | ✓ |
| IDX Intelligent Dynamics | — | — | ✓ | ✓ |
| H-Comp | ✓ | ✓ | ✓ | ✓ |
| Renaissance Compressor | ✓ | ✓ | ✓ | ✓ |
| MaxxBass | ✓ | ✓ | ✓ | ✓ |
| Kramer Master Tape | — | — | ✓ | ✓ |
| L4 Ultramaximizer | — | — | ✓ | ✓ |
| C1 Compressor | ✓ | ✓ | ✓ | ✓ |
| PuigChild 670 | — | — | ✓ | ✓ |
| Covers the 10 in this article | 4/10 | 4/10 | 10/10 | 10/10 |
·To build a cheap foundation first, Gold (C1 · H-Comp · MaxxBass · RComp)
·If you also want the L2/L3 mastering limiters, Platinum
·To get all 10 in this article as a perpetual purchase, Mercury (Kramer · PuigChild plus Curves Equator · IDX · L4)
·If you want the always-latest versions on subscription, Ultimate — or just buy the missing 1–2 individually
Waves bundles are on sale almost all the time (80–90% off isn't rare on Gold/Platinum). The prices above are current sale prices, but they vary by region and by sale, so check the linked page for the latest.
If you just want to add Curves Equator, IDX or L4 on their own, you can buy them individually from the links in the "full plugin list" above. I think the leanest approach is to first recreate this article's "order and roles" with the EQ and comp you already have, then fill the gaps with a bundle.
Non-Waves (not in the bundles, different makers): the master-stage Tape and Ozone, plus the reverb and analyzer, aren't Waves, so get them separately from the bundle.
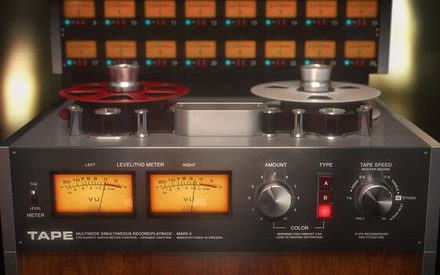 Softube TapeView →
Ozone 11
Softube TapeView →
Ozone 11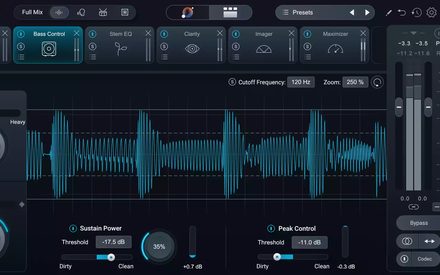 iZotope Ozone 11View →
VintageVerb
iZotope Ozone 11View →
VintageVerb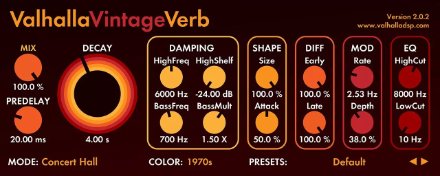 Valhalla VintageVerbView →
FreqAnalyst
Valhalla VintageVerbView →
FreqAnalyst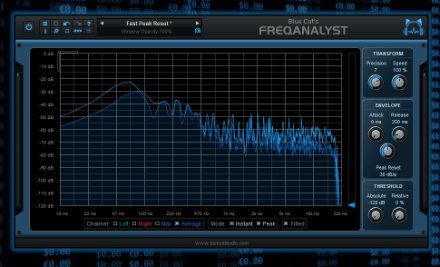 Blue Cat's FreqAnalystFree download →
Wrap-up
Boiled down, a Boom Bap mix is just locking in the routing and deciding a standard chain per category. After that, drop in the stems and every mix comes out with the same "your sound." The more you produce, the more this "pre-decided" approach pays off.
The plugins I named are my setup, but what matters is the order and roles (EQ → level → texture → comp → complementary EQ, lows mono, top rolled off, loudness not pushed too hard). Nail that and you can get plenty close with the gear you already own.
This weekend, try building one template start to finish. From your next beat on, the mix should get a whole lot faster. Now go make some good beats!